modern rails with webpacker and stimulus
I recently had the opportunity to start fresh with a new Rails app. Instead of building another traditional Rails app I took this chance to investigate using some modern tools like Webpacker and a modern CSS framework Bulma. In this post I’ll explain how I got everything wired together.
Here’s an outline of what we’ll cover in this post:
- creating a new Rails 5.2 app using Webpacker and Stimulus
- installing Bulma, my preference over Bootstrap
- installing Font Awesome 5, for icons
- creating a basic site layout with navigation
- wiring up the burger menu with stimulus
Create the Rails app
Yarn
Yarn claims to be “Fast, reliable, and secure dependency management” and it really is.
brew install yarn
Webpacker
This is Rail’s gateway to the land of JavaScript apps and npm packages. Webpacker can live side-by-side with the asset pipeline, although once you fully embrace it, you’ll find little need for the asset pipeline. You can use webpacker to manage all your assets.
Stimulus
A JavaScript framework from Basecamp that integrates nicely with Turbolinks. We’ll use this to “sprinkle” in some behavior to our views.
Rails new
rails new myapp --webpack=stimulus
cd myapp
An initial controller
bin/rails generate controller Home index about
A default route
Change your config/routes.rb file to look like this:
Rails.application.routes.draw do
  get 'home/index'
  get 'home/about'
  root to: 'home#index'
end
Switching from the Asset Pipeline
Open app/views/layouts/application.html.erb and replace stylesheet_link_tag with stylesheet_pack_tag. Next replace javascript_include_tag with javascript_pack_tag.
Bulma
Bulma is a relatively new CSS framework. It feels like a light, streamlined alternative to Bootstrap. Bulma doesn’t include any JavaScript at all. This means some stuff just won’t work out of the box. For example, the burger menu won’t toggle without a little JavaScript help. We’ll get to that later.
yarn add bulma
Open app/javascript/packs/application.js and add the following to the top:
import '../styles'
Create app/javascript/styles.scss:
@import '~bulma/bulma';
Font Awesome 5
To use icons in Bulma you need to include Font Awesome.
yarn add @fortawesome/fontawesome
yarn add @fortawesome/fontawesome-free-regular
yarn add @fortawesome/fontawesome-free-brands
The View
The navbar
Open app/views/layouts/application.html.erb and add the following just above the yield line:
<%= render 'layouts/navbar' %>
Create app/views/layouts/_navbar.html.erb:
<div class="container">
  <nav class="navbar">
    <div class="navbar-brand">
      <a class="navbar-item" href="#">
        <img src="https://bulma.io/images/bulma-logo.png" width="112" height="28">
      </a>
      <div class="navbar-burger burger" data-target="main-nav">
        <span></span>
        <span></span>
        <span></span>
      </div>
    </div>

    <div id="main-nav" class="navbar-menu">
      <div class="navbar-start">
        <%= link_to root_url, class: 'navbar-item' do %>
          <span class="icon">
            <i class="far fa-gem"></i>
          </span>
          <span>Home</span>
        <% end %>
        <%= link_to home_about_url, class: 'navbar-item' do %>
          <span class="icon">
            <i class="far fa-star"></i>
          </span>
          <span>About</span>
        <% end %>
      </div>
    </div>
  </nav>
</div>
This is basically copied from the Bulma examples. It is a basic nav bar with two menu items; Home and About.
We now have all the pieces in place and can start wiring up our Stimulus controllers.
Create a Stimulus controller
To keep this example simple, we’re going to create a single controller which we’ll attach to the body tag in the main layout. This controller will be responsible for rendering the Font Awesome icons (as described in a previous post) as well as handling our Bulma burger menu.
Create app/javascript/Controllers/main_controller.js:
import fontawesome from '@fortawesome/fontawesome'
import icons from '@fortawesome/fontawesome-free-regular'
import { Controller } from 'stimulus'
export default class extends Controller {
  initialize() {
    fontawesome.library.add(icons)
  }
  connect() {
    fontawesome.dom.i2svg()

    // Get all "navbar-burger" elements
    var $navbarBurgers = Array.prototype.slice.call(document.querySelectorAll('.navbar-burger'), 0);

    // Check if there are any navbar burgers
    if ($navbarBurgers.length > 0) {

      // Add a click event on each of them
      $navbarBurgers.forEach(function ($el) {
        $el.addEventListener('click', function () {

          // Get the target from the "data-target" attribute
          var target = $el.dataset.target;
          var $target = document.getElementById(target);

          // Toggle the class on both the "navbar-burger" and the "navbar-menu"
          $el.classList.toggle('is-active');
          $target.classList.toggle('is-active');

        });
      });
    }
  }
}
This controller imports the icons from Font Awesome when initialize is called. Everytime connect is called it renders the icons and then searches for navbar burgers to attach the appropriate click events on.
Connect the controller
Now we want to connect the body tag to our controller using an HTML5 data attribute.
Open app/views/layouts/application.html.erb and add the following attribute to the <body> tag.
<body data-controller="main">
Testing
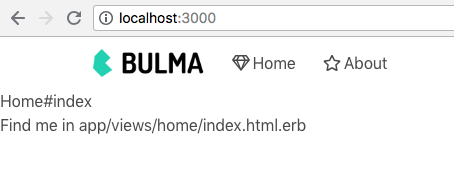
Run your rails app and you should see the simple site with a navbar across the top:
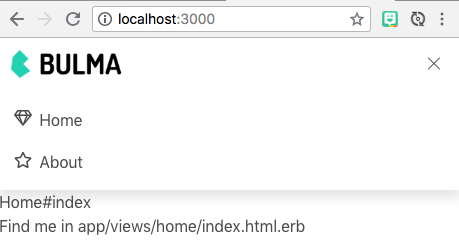
Now try shrinking the window until the menus are hidden and replaced with the burger menu. Notice when you click it, the menus reappear:
You now have a Rails 5 app with Turbolinks, Stimulus, and Font Awesome 5. 🥑🍞
- rails
- stimulus
- webpacker
- bulma